MCP servers and connectors
Give the AI tools from other apps and services: connectors on the internet, and MCP servers that run on your PC.
Written By Daniel Nguyen
MCP servers give the AI tools for other apps and services, such as your notes, your tasks or your email. There are two kinds:
- Connectors run on the internet. Add them in Settings › Connectors.
- Local MCP servers run on your PC. Add them in Settings › MCP Servers.
Once added, their tools are under Connectors in a chat's Tools menu. See Tools and web search.
Add a connector
- Open Settings › Connectors.
- Under Browse Connectors, click the one you want.
- Click Connect. If it asks you to sign in, finish in your browser, then come back to BoltAI.
When its status reads Connected, turn it on in a chat's Tools menu and ask, for example What's due this week in Linear?
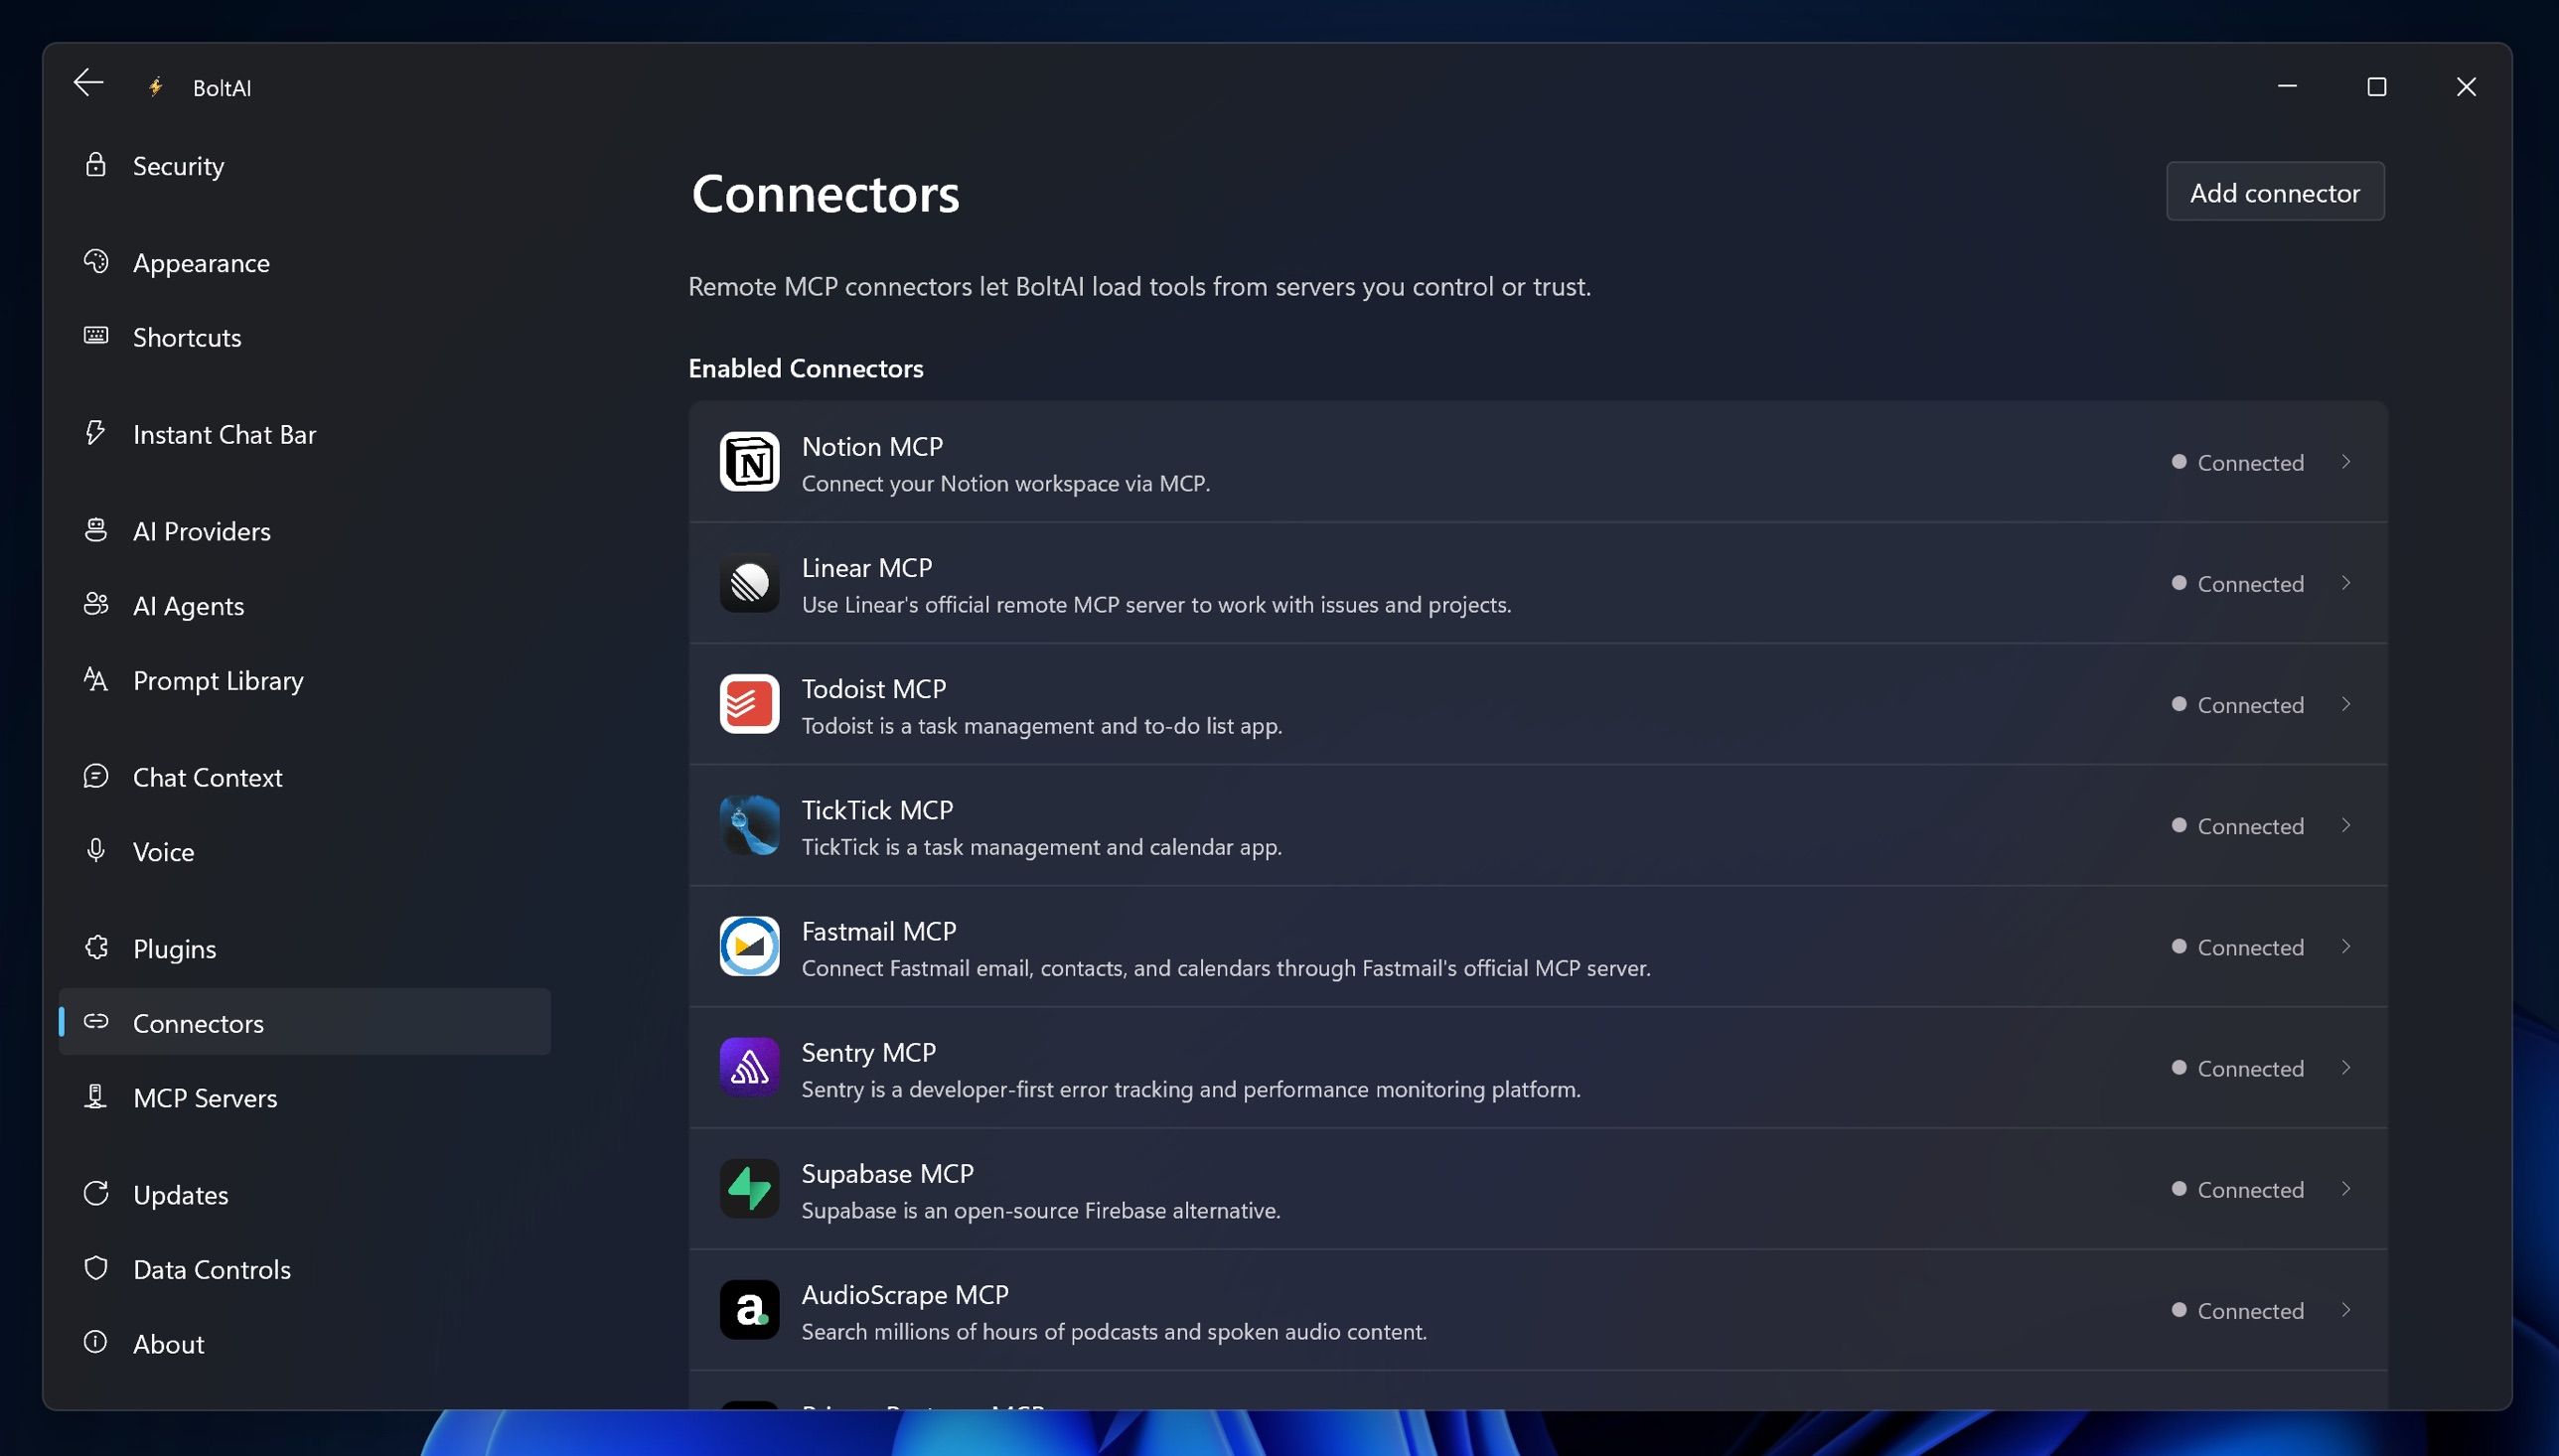
Connectors you added on another device are listed under Enabled Connectors. To use one on this PC, click it, then click Connect or Reconnect. Connectors sync with your account, but sign-ins and custom headers stay on each device, so you connect once on each PC.
Add a custom connector
You need the server's MCP address from the service, such as https://mcp.example.com/mcp. A landing page or docs link won't work.
- In Settings › Connectors, click Add connector.
- Enter a Name and the URL. Description is optional.
- Under Authentication, choose a Method:
- OAuth / Sign In: click Authenticate and sign in in your browser.
- Custom Headers: click Add Header, and enter the header name and value the service gave you.
- No Auth: for servers that don't need a sign-in.
- Click Save.
Your own connectors are listed under Custom Servers.
A connector stopped working
Click the connector in Settings › Connectors and check its Status:
- Authentication Required or Connection Error: click Reconnect, and sign in again if your browser asks.
If it still fails, click … and choose Reset Authentication..., then sign in again. To change its address or sign-in, choose Edit. To remove it, choose Delete.
Add a local MCP server
Local servers are listed in the file mcp.json, in the .boltai folder of your user folder. BoltAI starts each server on your PC.
- Open Settings › MCP Servers.
- Next to Edit Configuration, click Edit….
- Add your servers and click Save.
For example, this adds a server that can read files in your Documents folder:
{ "mcpServers": { "filesystem": { "command": "npx", "args": ["-y", "@modelcontextprotocol/server-filesystem", "C:\\Users\\you\\Documents"] } }}BoltAI runs the command as a terminal would, so the tools it uses, such as Node.js for npx or Python for uvx, must be installed on your PC.
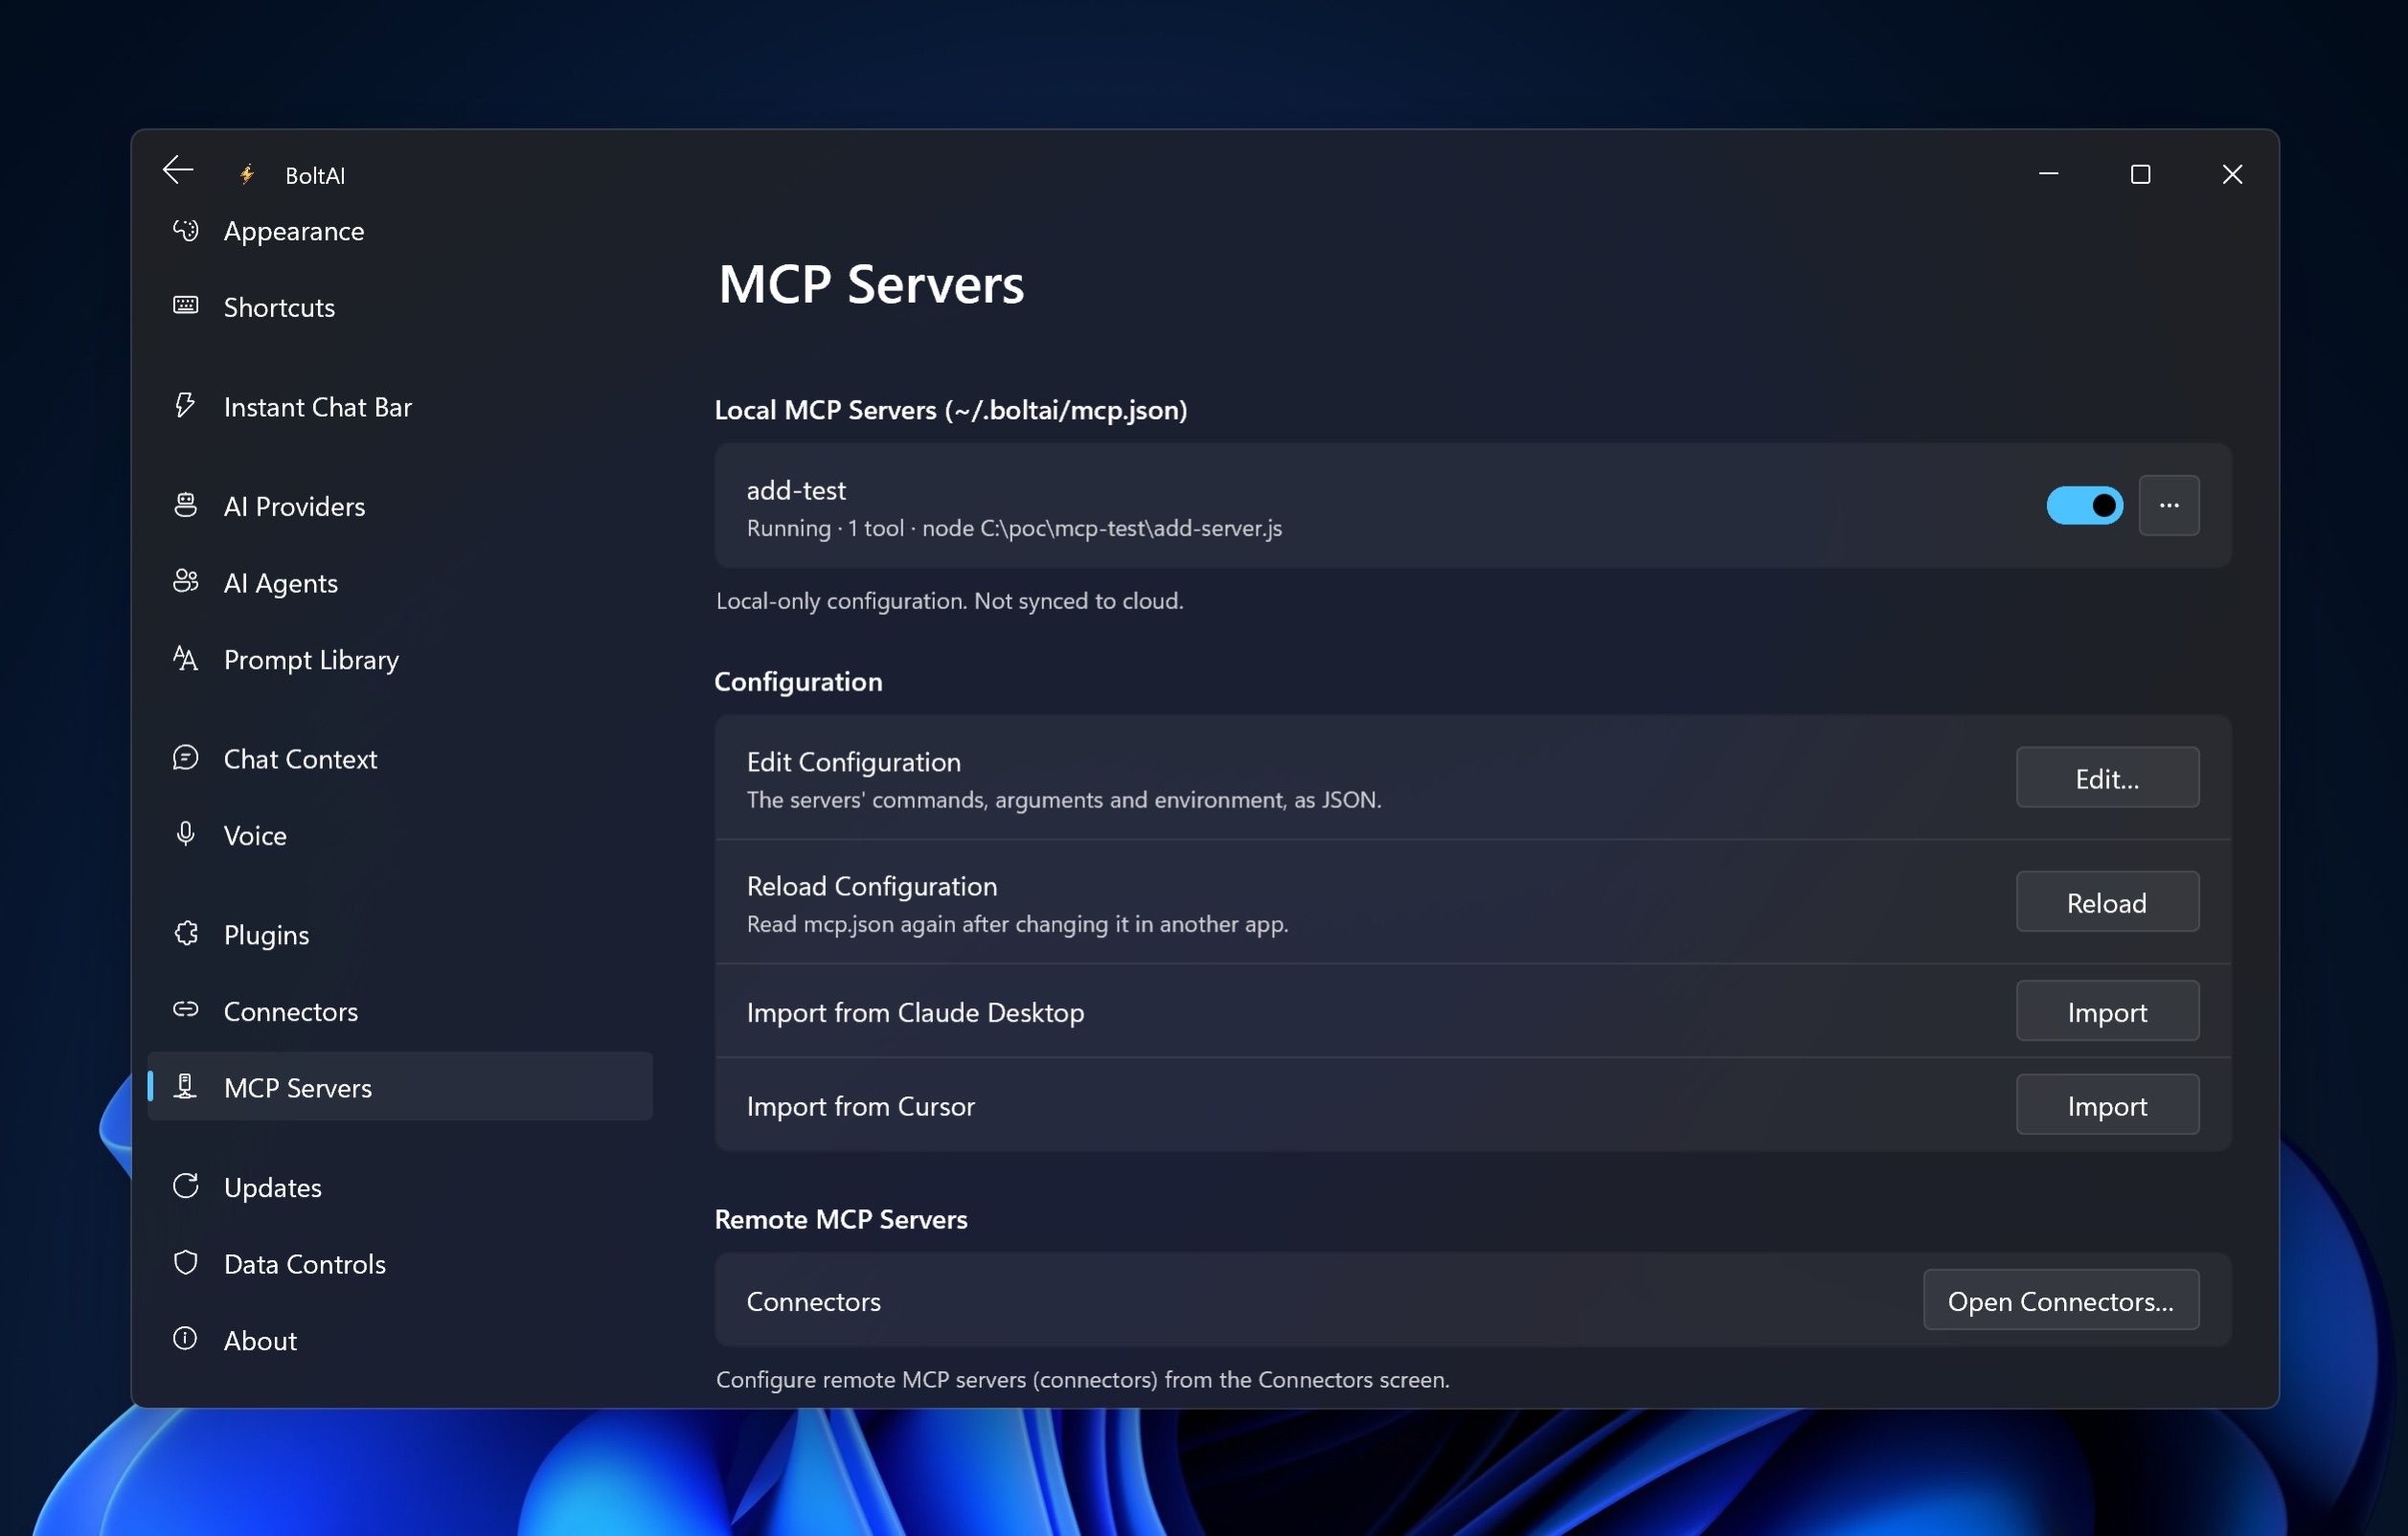
When a server is ready, it reads Running and the number of its tools. Local servers stay on this PC. They aren't synced to your other devices.
Bring in servers from Claude Desktop or Cursor
Under Configuration, click Import next to Import from Claude Desktop or Import from Cursor. BoltAI adds the servers it doesn't have yet.
Edit mcp.json in another app
After you save the file in another app, click Reload next to Reload Configuration.
Turn off or remove a server
- Use the switch next to a server to turn it off or on.
- Click … next to a server and choose Reload Server to restart it, or Delete Server to remove it from mcp.json.
A local server doesn't start
If a server reads Couldn't start:
- Click Edit… next to Edit Configuration and check its command and args.
- Run the same command in Terminal to see the error.
- Click … next to the server and choose Reload Server.
Was this helpful?
Still need help? Ask the team