Projects
Group chats in a project, give them shared instructions, model and files, and let them read folders on your PC.
Written By Daniel Nguyen
A project keeps related chats together and gives them shared settings: instructions, a model or agent, tools, and files. Every chat you start in a project begins with those settings.
Create a project
- Click New Project at the bottom of the sidebar, or press Ctrl+Shift+N.
- Type a name and click Create Project.
The project's page opens, ready for a first chat. The project also appears under Projects in the sidebar.
To add a subproject, right-click the project in the sidebar, choose New Subfolder, type a name and click Create Subfolder. It appears inside the project.
Start a chat in a project
Click the project in the sidebar to open its page, then click New Chat.
To see a project's chats in the sidebar, click the arrow next to it. It shows the newest 10. Click See All for the rest. When you're in a project chat, press Alt+Left or click Back at the top left to go back to the project's page.
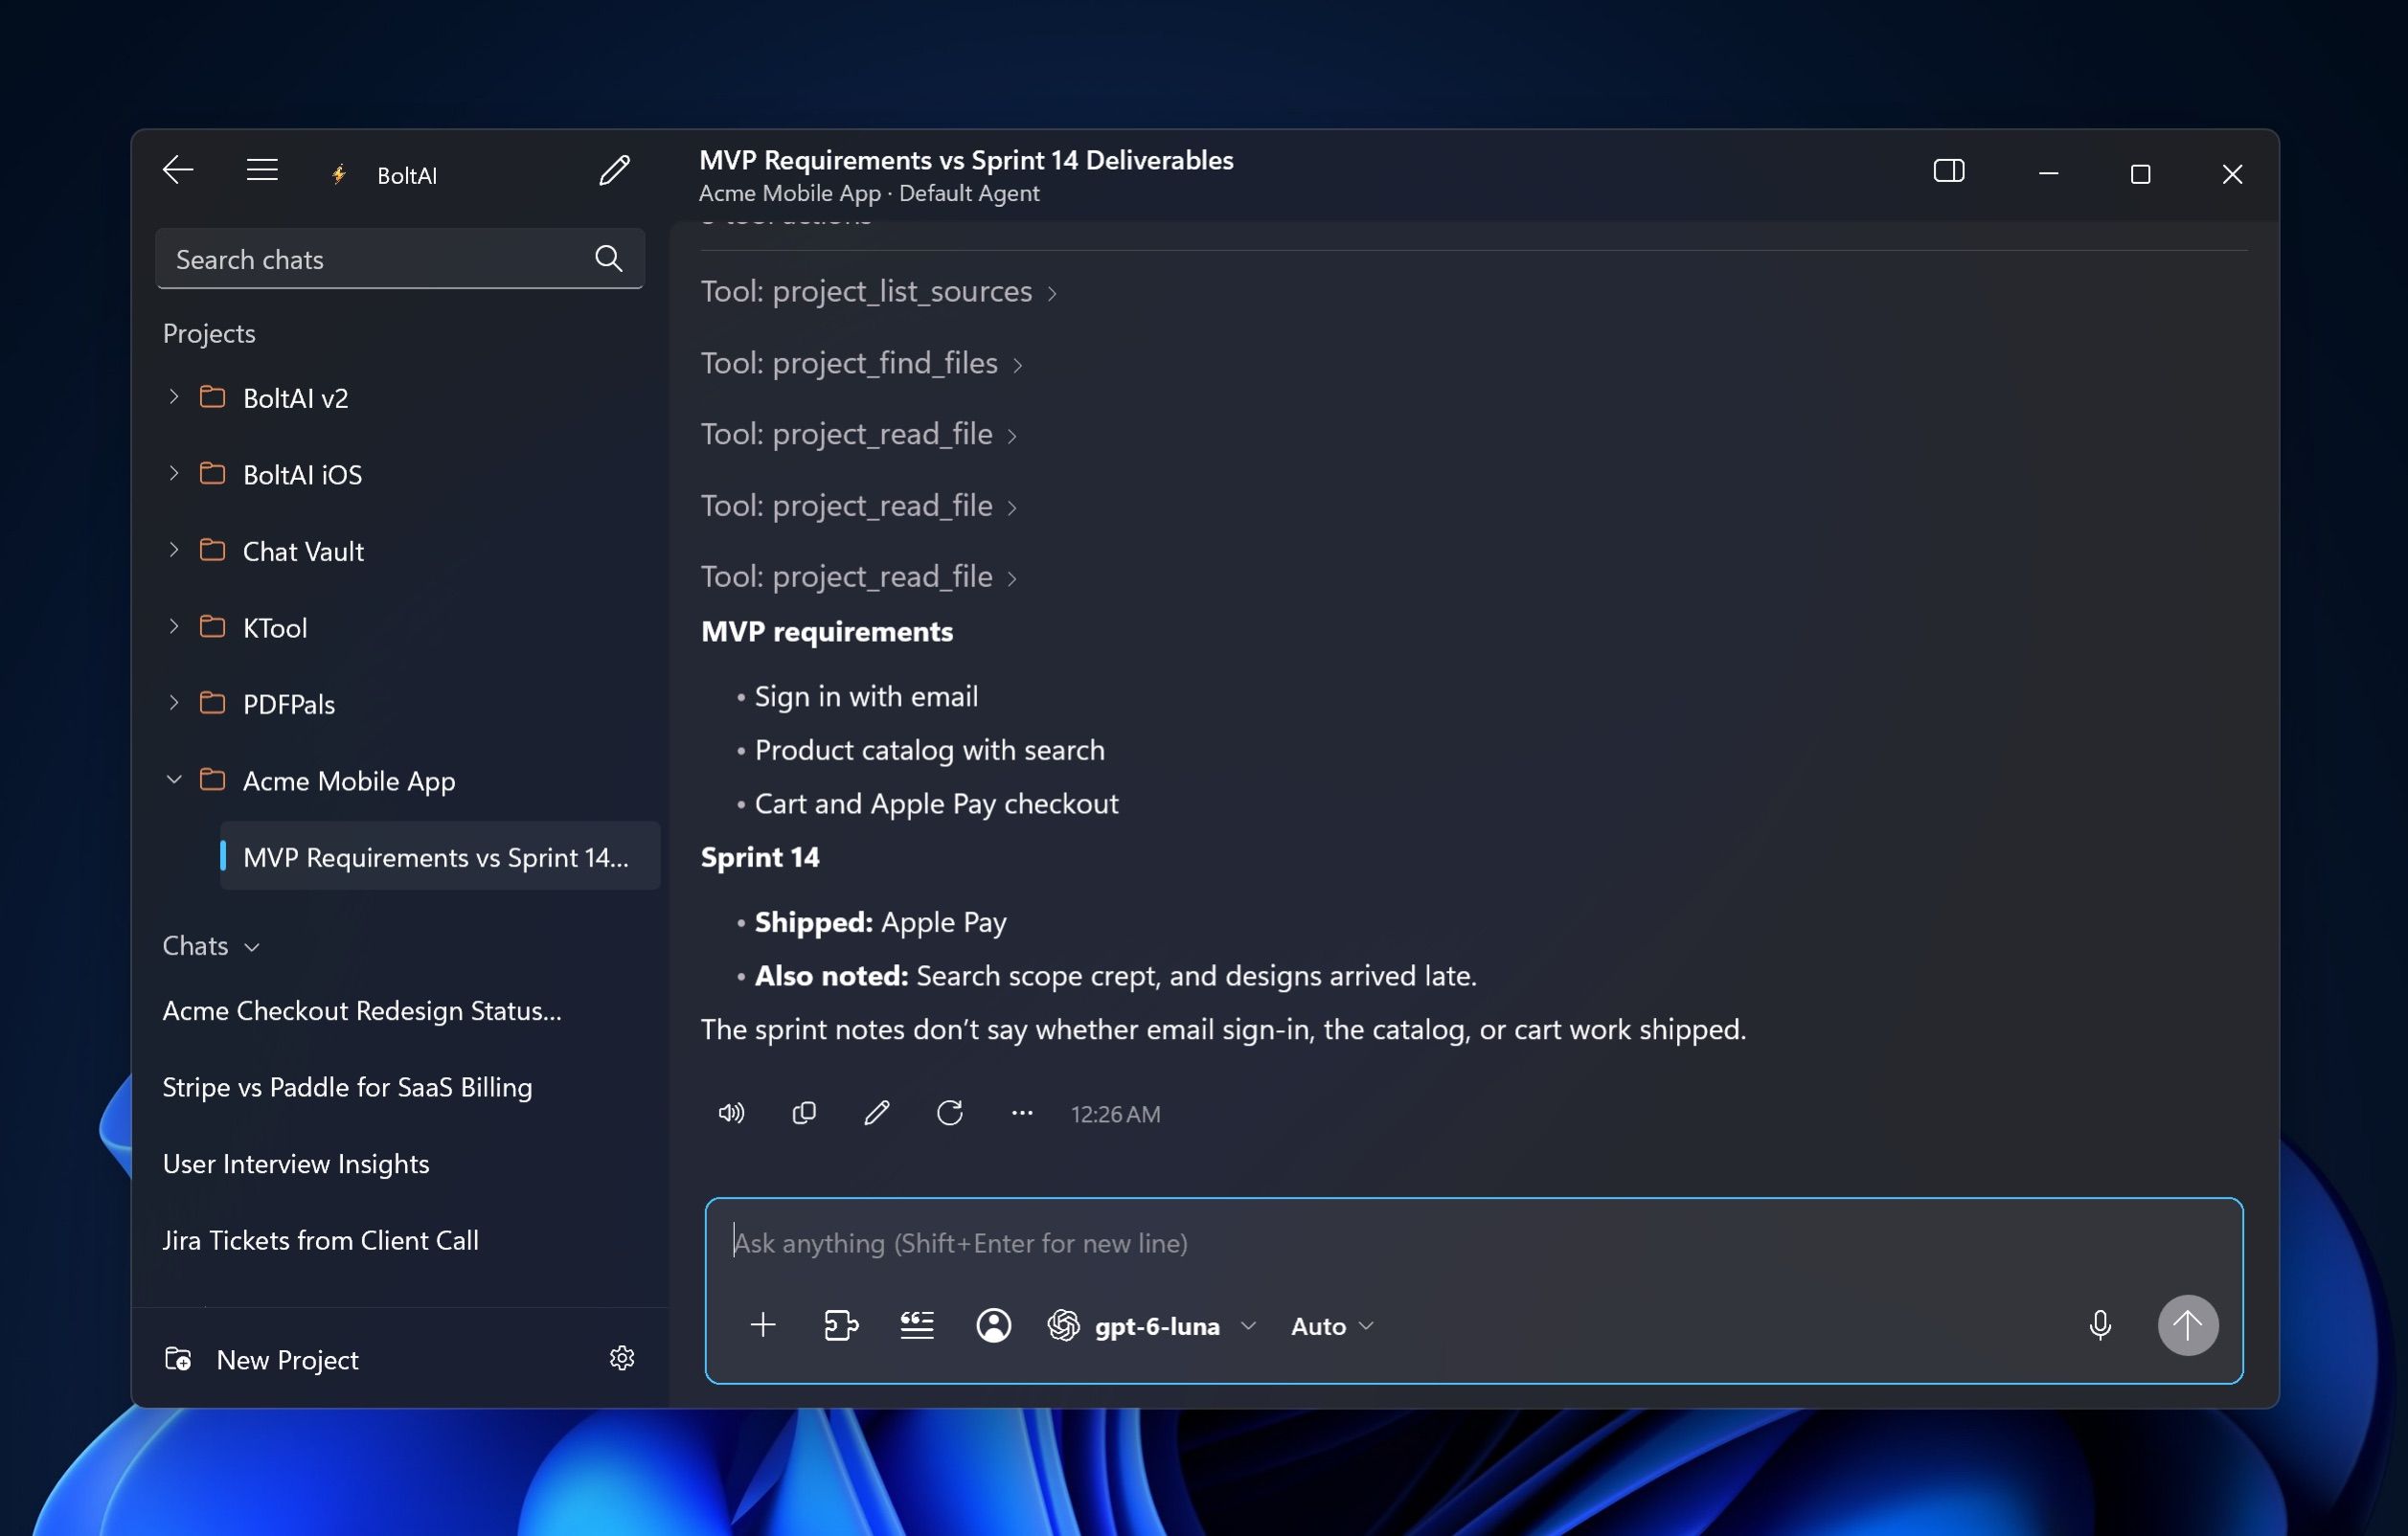
Move chats in or out
- Move a chat in: drag it onto the project in the sidebar, or right-click it and choose Move to, then the project.
- Move a chat out: right-click it and choose Move to › No Project.
Give the project instructions
- On the project's page, click … and choose Edit Instructions.
- Type instructions for every chat in the project, for example You're helping with the Acme mobile app. Keep answers short.
- Under Prompt Composition, choose what happens when a chat or agent has its own system prompt:
- Override: the chat's or agent's prompt replaces the project instructions.
- Merge: both are used.
- Click Save.
Choose the project's model, agent and tools
- On the project's page, click Project Settings….
- In General, choose the Agent, Provider and Model the project's chats start with, and their Default Tools.
- Use Plugins to pick the tools, and Model Parameters to fine-tune the model, for this project.
New chats in the project start with these settings. To change them for a single chat, use the Inspector. See The Inspector.
Work with files and folders on your PC
Link a folder or files to the project, and its chats can find, read and search them. With your approval, they can also edit them.
- On the project's page, click Project Settings…, then Linked Sources.
- Click Link folder… or Link files… and choose what to link.
- Next to each source, choose Read only or Read & write.
- Under Permissions, set File edits:
- Ask before editing: BoltAI shows each change and asks Allow BoltAI to edit this file? Click Allow Once or Always Allow.
- Always allow for this project: chats edit Read & write sources without asking.
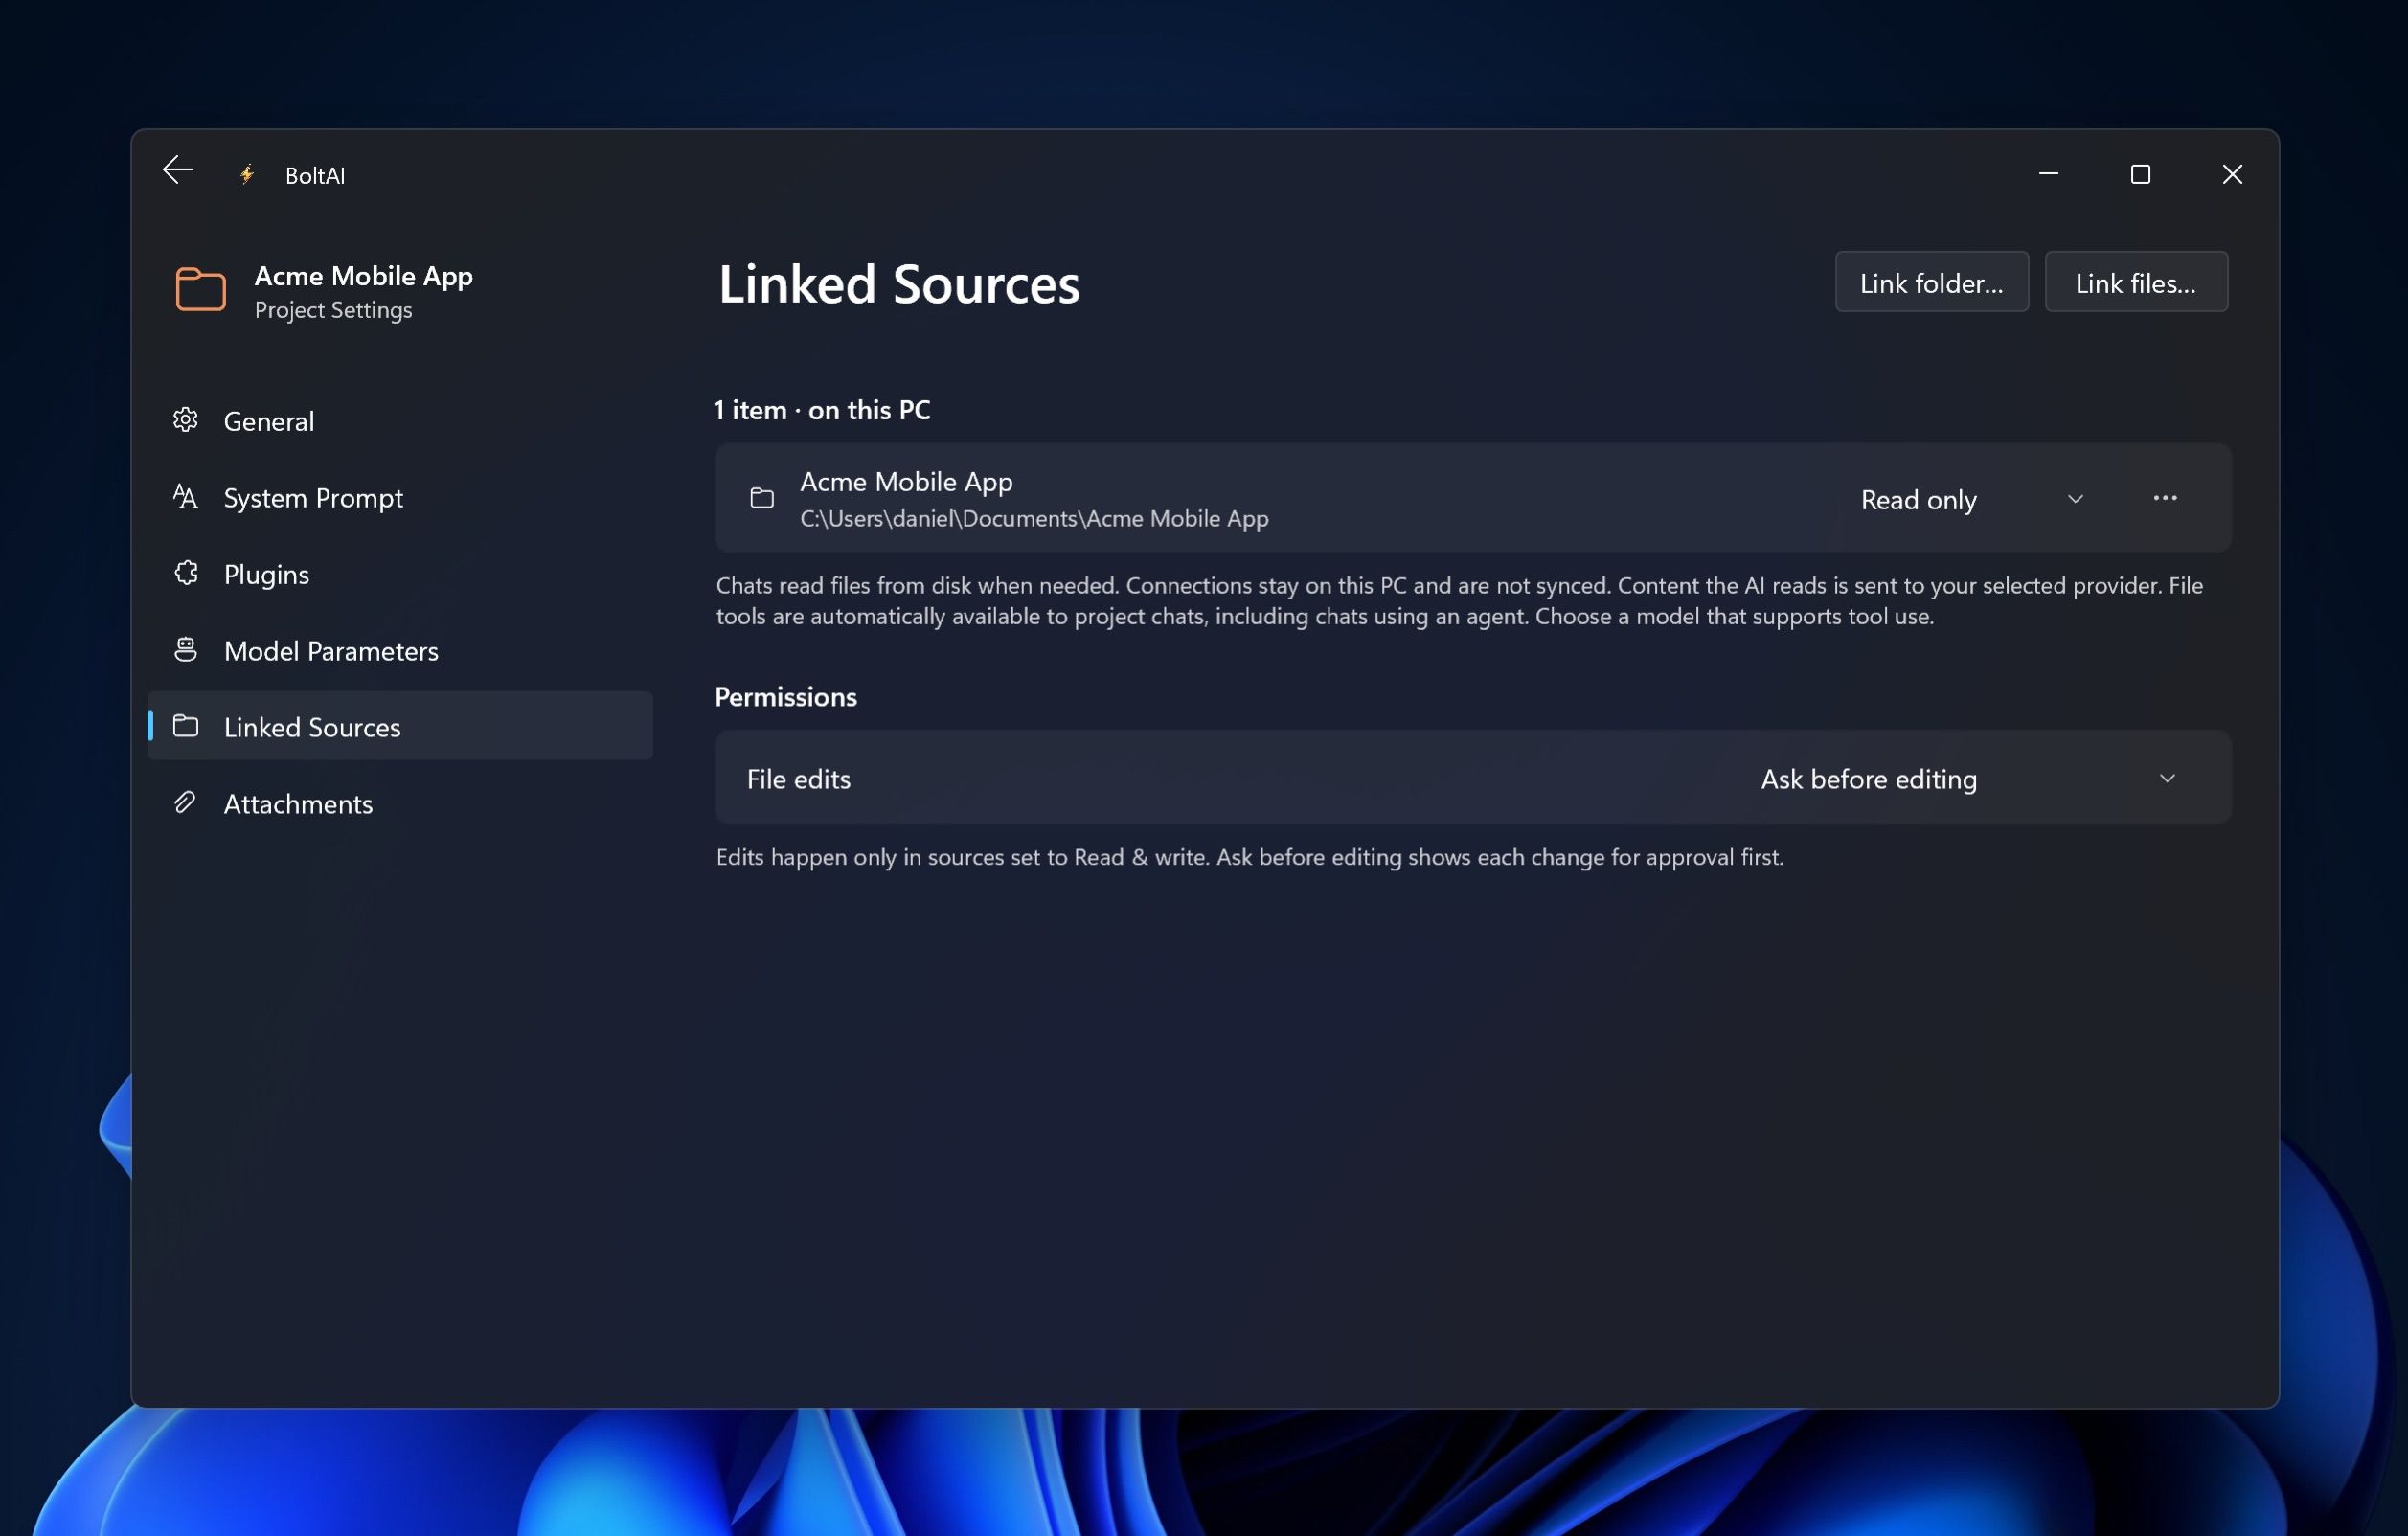
Then ask in a project chat, for example Compare the MVP requirements with the sprint 14 notes. Use a model that supports tools.
Linked sources stay on this PC and aren't synced to your other devices. The parts of files the AI reads are sent to your AI provider.
To manage a source, click … next to it: Show in File Explorer, Copy Path or Remove Connection…. Removing a connection doesn't delete the file.
Add files every chat in the project reads
- Click Project Settings…, then Attachments.
- Click Add and choose the files. Each file can be up to 10 MB.
Rename a project or change its icon
- Rename: click the project's name at the top of its page, or right-click the project in the sidebar and choose Rename.
- Change the icon: right-click the project in the sidebar, choose Change Icon, and type an emoji. Leave it empty to go back to the folder icon.
Delete a project
- On the project's page, click … and choose Delete Project.
- Choose:
- Delete Project, Keep Chats: the chats move to your chat list.
- Delete Project and All Chats: the project and its chats are deleted from all your devices. This can't be undone.
Was this helpful?
Still need help? Ask the team